Monday, December 14, 2015

Science Ideas for 12/14/2015

Holiday / Snow Day Edition. Big idea this week: give the gift of science. If you value this post, and you have a teacher friend at another school, forward this to them. I’d love to expand its reach. A bigger audience means more ideas.

Kindergarten: Off the pacing map, but what could be more appropriate than Weather! Does weather affect our daily lives? Hmmm… Also, turn it into a measuring activity as the day goes on. More snow should fall today and even tomorrow, so go stick a ruler out there, or alternative units. Better yet, measure it a few units at once. Or throw it out as a design challenge: how should we measure how much snow has fallen? You could do the same with a snowball, but in reverse. Make a big snowball, bring it inside, maybe in a bowl or bucket, stick a ruler in it, and chart its melting. You could compare the melting rates of compacted snow vs. uncompacted. Get two bowls, one with light scooped snow, and the other stuffed with snow. I’m always looking for ways to introduce measurement / graphing, and they’ll certainly be interested in how much snow is falling outside…

1st: We got a great result with our “light painting” idea. This was a basketball bouncing, with an LED taped to it. It took a few tries, but we felt that the kids understood the motion of the ball in a new way after this visualization. We’d also like to test swinging the light on a string for back and forth, and maybe taping it to a football for a zigzag patten.


2nd: Think about stars this week, and constellations. This one is always a bit tricky, because it’s a little hard to see the stars during the day. Great conversation: Where do they go during the day? If they need any help with this one, shine a dim flashlight at them or the board while the lights are on. Then turn the lights off, and ask them to notice how bright it seems. Helps them understand why we can’t see the stars during the day. Same thing with your smartboard projector – a dark room makes it seem brighter.

3rd: This week, let’s take this indicator: “Show that objects at rest will not move unless a force is applied to them.” This is intuitive, and not that exciting by itself. Let me tell you what gets my blood pumping about Newtonian physics: that a body in motion will stay in motion until acted on by another force. Same exact principal as being at rest, but this one is counter intuitive. Why? Because there is a lot of friction here on Earth, so everything we see will slow down, once the force disappears. Stop pedaling your bike, and eventually you’ll fall over. So we want to find something with super low friction, that will keep moving long after the force has stopped pushing. The best thing I’ve found so far: a bowling ball. I bought one at the DI for $3, and if you give it a gentle push, it’ll roll about 60 feet down the hall. It’s weird – it just keeps going. This is because it has a lot of mass, and a very low rolling resistance. Thus very low friction. So kids can start to understand that if there was NO friction, it would keep on rolling forever. Unless another force comes along. Now we can start to appreciate why objects being at rest is so interesting. Let me know when I can show up to your class with my bowling ball – it’ll take just 15 minutes.

4th: Fossils. Lots of great stuff here, and you probably have your own lessons that you love. Random big idea: the shallow ocean that used to cover Utah hundreds of millions of years ago was not Lake Bonneville. Bonneville was more in the 15,000 – 30,000 year ago range, which sounds like a long time ago. But it isn’t, geologically speaking. If the Earth’s existence was a timeline 100 feet long, the ancient ocean stuff happened about 8 feet from today. Bonneville would be a fraction of an inch from the end. Trilobites did not come from Lake Bonneville. Check out think link for a little more info:

http://geology.utah.gov/popular/general-geology/geologic-history/utah-a-geologic-history/ 

I do the “toilet paper timeline” with 5th grade, but consider doing a condensed version of that in 4th to help them understand the timescales of fossils, the rock cycle, and weathering and erosion.

http://www.nthelp.com/eer/HOAtimetp.html 

5th: I dare someone to make circuits from play doh. It totally works.
This is a “squishy circuit” and many folks are using home-made play doh, but commercial works too. Use a 9v battery, because the play doh has a much higher resistance (which is to say it’s not as good a conductor) compared to copper wire. Usually, a 9v battery will smoke any little lightbulbs / LEDs you’ve got, but with the play doh it works great. See this TED talk:

https://www.ted.com/talks/annmarie_thomas_squishy_circuits?language=en

 If you need LEDs, get in touch.

6th: We’re approaching the Solstice – December 22nd. Look at a data table, such as this one:

http://www.timeanddate.com/sun/usa/salt-lake-city

See what the kids notice about the times of the sunrise / sunset. Also the length of day. The sun actually continues to rise a little later in the morning, but you can clearly see the length of day as the shortest on the Solstice. They can also notice that those sunset/sunrise times continue to change by about 1 minute (a little less) per day. Interesting patterns.

Here is a very cool video from the Exploratorium in San Francisco. The guy set up a camera on the roof, and took a time-lapse video every day for a year. Then he put all 365 vids together into one video, and synched up the times. What a cool way too use technology to observe something that’s otherwise subtle and hard to visualize. You can get the idea from the first minute or so, then skip to about 3:30 to see it all in reverse. Notice the weather variations throughout the year from the cloud cover.

https://www.youtube.com/watch?v=PNln_me-XjI

 Enjoy the holiday! If anyone tells you that physicists have calculated that Santa cannot exist because he’d have to travel so fast he’d burn up in the atmosphere, tell them he obviously has an ion shield. More here: http://phys.org/news/2004-12-physics-santa-claus.html




Monday, December 7, 2015

Science Ideas for 12/7/2015

Big Idea – Data.  How can your science explorations and activities generate data, either qualitative or quantitative? 

Kindergarten – Living Things. Here’s an Indicator: “Construct questions, give reasons, and share findings about all living things.”  You can do a lot here, so for right now you can be thinking about hibernation.  Unrelated to this standard, but appropriate for the season: it’s a perfect time for an engineering challenge!  If you’re covering the Gingerbread Man  Check this out: 


1st – Movement of Nonliving Things.  Look at this indicator: “Compare and contrast the movement of objects using drawings, graphs, and numbers.”   Here’s a really neat project from Ms. Salas’ classroom, which we originally found on Pinterest.  They made marble mazes with the edges of paper plates.  After construction, you could time how long each maze takes to run, and graph the results as a class.   Super fun for the Motion of Objects.


2nd – Night Sky and Weather.   Here’s the indicator: “Observe, describe, and record patterns in the appearance and apparent motion of the moon in the night sky. “ We want kids to understand that the moon moves across the sky throughout the day, very similar to the sun.  We also want them to see how its position also changes day over day, rising and setting at slightly different times every day. 

Ms. Soria and I have been playing around with a device that might prove interesting to you – I’m calling it a moon observation stick. Pick a place outside where you can affix a pole or stick to another object.  It’s okay to take it inside between observations, as long as you can get it set up exactly the same each time.  The idea is that we’ll use a soda straws to sight in on the moon.  Imagine pointing a telescope at something - the next person can walk up and see what you just saw.  While sighting the moon through the straw, tape that straw into place on the stick.  Now we have a fixed reference point in an otherwise blank sky, so if the moon moves a little, we can tell.  We won’t be able to see it any more through the straw.  We could aim a new straw at its new location.  Which is exactly what we’re going to do.  Here’s our prototype rig below, with just one straw taped to it so far.  The thumb tack in the picture is coincidentally roughly where the moon was when we had it outside.


Come back in an hour, and tape a new straw to your rig.  Repeat at regular intervals throughout the day.  Maybe once an hour. You should end up with a sort of fan shape of straws, all pointing to different spots in the sky, along the path of the moon.  And if you look through them one by one, you can visualize where the moon was at different times.

If you enjoyed that, now visit the same place outside at the same time for a week.  This is the same idea, but now you’re observing how the moon moves day over day.  It’s important to go at the same time every day, otherwise the pattern you observe won’t seem consistent.  Very fun stuff! 

This could work OK this week, but better next week.  We'll have a new moon on Friday, so it'll wax (get bigger) from there.  Next Monday, the moon will rise at 10:00 AM and set at 8:40 PM, just to give you a reference.  Find all that information here: http://www.timeanddate.com/moon/usa/salt-lake-city

As always, feel free to ask for any clarification.

3rd - Here's a simple idea for simple machines.  Get a smooth pencil, and drape yarn over it.  Tie the yard to something with a little weight, like a pair of scissors.  Lift the scissors with the string - you have a pulley.  You've changed the direction of the force - a downward pull becomes an upward lift.  Now, get two pencils.  Here's the hard part.  tie one end of the yarn to one of the pencils.  See photo.  Wind the yarn around the pencils a few times.  Now one kid holds both pencils, and the other pulls the string.  Notice how much string needs to be pulled to move the pencils.  You have to pull a long distance to get a big force.  For this one, since the string is wrapped 7x, you’d need to pull seven inches of string through to move the pencils one inch.  But you’d get seven times the force!  (Minus friction but don’t get into that too much right now…) Feel how much force is exerted on those pencils.  Notice how hard you have to push to "separate" the pencils, but how quickly it reels in the string.  So when we apply a lot of force, we get movement over a lot of distance.  Keep talking about those trade-offs!


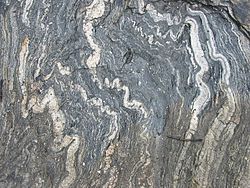
4th – This one from Barb Rogers.  Misconception: metamorphic rocks have layers.  Let’s get away from this terminology.  Instead, what we’re usually seeing is banding – when the original rocks are undergoing metamorphosis, the minerals inside can reform into bands.  (Occasionally, we can still observe the original bedding layers in a metamorphic rock, like a sandstone that turned into quartzite, but that usually not what we’re seeing when kids notice the banding.)  It’s a different mechanism than the formation of layers in sedimentary rocks, and understanding that process helps kids understand the story of metamorphic rocks.
 I’ll add another strategy tip, which is teaching rock classification into igneous, metamorphic, and sedimentary rocks by how they were formed, as opposed to how they look.  The rock’s physical characteristics give us evidence on how those rocks were formed, but the evidence itself does not make it one type of rock, or another.  It’s a fine distinction, but I think it’s an important one.  Think about geology as a story, as a series of events.

5th -  A few last details for electricity.  This is a great time to circle back to electro magnets, and talk about circuits within the context of building them.  We need the kids to know that the more winds of wire, the stronger the magnet.  Here’s a bit of an exploration, if you’re curious: can we make an electromagnet without a nail or a bolt on the inside?  Using a soda straw, or pen tube for example?  (Hint: we sure can!) What would happen to its strength if we did that?

 6th - Once again, see 2nd for overlapping ideas on the moon.  Here's your indicator: "Compare how objects in the sky (the moon, planets, stars) change in relative position over the course of the day or night."

I'll emphasize the fact that we can observe the moon during the day. As teachers, it's all we've got.  I'd have the 6th graders all design and build their own rigs for tracking the moon.  They might use soda straws, or some other method for showing how it moves across the sky.  It might also help them observe the changes in its appearance.

Monday, November 30, 2015

Science Ideas for 11/30/2015

Howdy Utah Elementary Science Teachers,

I don’t get to see you enough.  Really.  So to solve that problem, I’m going to start a weekly Blog post.  Here, you’ll find one good idea from your science core for this week.  I’m going with the Salt Lake City School District pacing maps, so if you’re not, this will be slightly less timely but no less useful.  One good idea is about all I can process at a time, so that’s what we’ll do here.  I might also mention a common misconception I want you to watch out for.  At the top, I’ll give a thought that’s applicable to all grade levels.  Then, scroll down to find your stuff.  Or, read it all for a big picture view.  You might find something applicable to your grade, as many of these concepts spiral through the year.

If this is useful, I’ll keep doing it.  If I run out of things to say, or people get tired of reading it, I’ll stop.  If you have anything to add, by all means, chime in.  If your idea makes it into a future issue, I’ll give you a roll of masking tape or pack of sharpies.  Or batteries, if you’re 5th grade. 

Big Idea for the week: Have you ever told the kids what’s going to happen before you do the demo?  I know I have, countless times.  “And when I plug this thing in, (everyone take an extra step back) you’re gonna see it…”  So the question is, what would happen if we didn’t?  How can we let their observations and the data tell the story?  Then, who’s constructing the knowledge? 

Grade Level Content:

Kinder – Living Things, Parts of Living Things (Plants.)  Add a bit of green to your classroom!  This is a great time to start some little seeds in cups. Try doing a few types of plants that will look different, such as beans, lettuce, wheat, and pumpkins.  Put them in the window, or if you feel really ambitious, set up a grow light, for about $15:  http://www.amazon.com/Lithonia-Lighting-1233-SHOPLIGHT-Fluorescent/dp/B000HMBMEO . See me any time for help setting one of those up for your classroom.  Great for this indicator: “Describe some changes in plants and animals that are so slow or so fast that they are hard to see.” If you use plants that don’t fruit, like the wheatgrass, no one will be bummed when they don’t.  Email me if you need wheatgrass seeds.

1st – Movement of Nonliving Things.  Here’s the indicator: “Describe, classify, and communicate observations about the motion of objects, e.g., straight, zigzag, circular, curved, backandforth, and fast or slow”  This is a perfect time to play with the ramp.  Roll different things down it.  Look for things that will roll in a zigzag – try a football, or a cup.  I’m playing with an idea of light painting – where you take a long exposure photograph of a light so it creates a “streak” or a “trail” across the picture.  So if you pointed a flashlight at the camera and waved it in a figure eight, it might end up looking like this:

Image result for light painting

We could use this technique in your classroom to “take a picture” of the trail of a moving object.  So if we put a bright light on a string and swung it back and forth, we’d see the arc pattern there.  If we bounced a light-up ball, we’d get a different trail. Anyway, contact me if you’re interested in developing this idea.  Tell me when we can meet for an hour.  I predict we’ll need 2-3 hours of classroom time to do something interesting.

2nd – Night Sky, and Weather.  This week is perfect for observing the moon.  Here’s your indicator: “Observe, describe, and record patterns in the appearance and apparent motion of the moon in the night sky.”  Don’t tell anyone I told you this, but you can observe the moon perfectly well in the day sky too. Go outside at 8:30 AM every morning (bundle up!) and find the moon.  If you go out at the same time every morning, you’ll notice how the moon is in a different position every day.  It sets about an hour later each day, so at this point, it’ll be a little higher tomorrow at 8:30, and higher still the next day…  Here’s a link to the moon rise and moon set calculator - http://www.timeanddate.com/moon/usa/salt-lake-city?month=12&year=2015  They don’t need to know the phases until 6th grade, but it wouldn’t hurt them to mention it.  Draw its position each day.  It helps to find some trees or something to kind of look through to give you some kind of reference.  Or, walk around until a power pole, street light, whatever blocks the moon exactly.  Mark where you’re standing with chalk on the blacktop.  Do it again tomorrow.  And the next day.  See what patterns emerge.

3rd – Forces and Motion, Gravity. Within this objective, you have many things, including simple machines. Here’s your indicator: “Investigate how forces applied through simple machines affect the direction and/or amount of resulting force.”   A few things to keep in mind here.  I’ve often heard teachers say “simple machines make work easier.”  I think this is inaccurate.  Imagine a staircase, or a handicapped ramp.  You can walk up the few steep stairs, or up the long handicapped ramp.  See picture below.

Image result for handicapped ramp

Both of these will take the same amount of “work” as defined by physics.  One will require less force, but greater distance.  One requires greater force, but over less distance.  Never tell them these simple machines make things easier – that sounds like magic.  They let us trade force for distance, or vice versa.  We can investigate this a lot with levers too. The other thing simple machines can do is change the direction of a force.  You push up on one side of the teeter totter, the other side goes down.  You pull down on the rope, running through the pulley, and the other side goes up.  So you’re either trading force and distance, or you’re changing the direction of a force.  If you want to play with rock climbing pulleys to let your kids lift each other a few inches off the ground, email me with a one hour block of time.  We might need the gym.

4th – If you haven’t done the classic “Box of Rocks” identification lab, email me and I can get you set up.  It covers this whopper of an indicator: “Sort rocks by appearance according to the three basic types: sedimentary, igneous and metamorphic (e.g., sedimentary-rounded-appearing mineral and rock particles that are cemented together, often in layers; igneous-with or without observable crystals that are not in layers or with or without air holes or glass like; metamorphic -crystals/minerals, often in layers).”  Lots of fun.

5th – Circuit building!  My favorite unit, I’ll confess.  See me if you’re in need of supplies.  Misconception debunked: when electricity flows through a circuit, electrons do not move through the wires at the speed of light.  They do flow in DC power, but at centimeters per hour.  They don’t flow at all in AC power, which is what comes out of the wall. They sort of wiggle.  Energy moves through the circuit, and that flows almost instantly.  Imagine a bike chain.  If you pushed on one link with your pedals, the whole chain would start moving pretty much instantly.  The individual links might take a while to make it all the way around, but the energy doesn’t travel via a single link.  Same with electrons, basically. 

I’ve newly discovered these, called paper circuits: http://tinkering.exploratorium.edu/paper-circuits I’ve ordered some supplies, so you’re interested in trying this in your classroom, email me with the following information: an hour when we could meet before the lesson, and 2-3 hours of instructional time, ideally within the same week but we’ll make it work.


6th – Size and Distance of Earth’s Solar System, Earth Moon.  See 2nd grade’s entry this week for some thoughts on observing the moon during the day.  If you’ve never done it before, check out Walking the Solar System: http://www.noao.edu/education/peppercorn/pcmain.html  There are many versions of this lesson, and I’m sure they all work great.  Be warned, this one goes big.  Interestingly, at this scale, the speed of light is about 2 feet per second.  That’s roughly half average “walking speed” whatever that means.  You could also imagine walking 10 feet in five seconds – you can do the math.  Second, everyone’s favorite star to say out loud, Betelgeuse, would be about the size of your school.  If we inscribed your school in a big circle.  That’s a mind blower.  It’s also Orion’s shoulder, and the 9th brightest star in the sky.  Let me know if you’d like me to accompany one of these Walks.  Register it as a walking field trip – you’ll need to leave campus to get to the outer planets.